All Categories
Featured
Table of Contents
- – Awnings For Trailers Atwood, CA
- – OCRV Center
- – Rv Restoration Companies Atwood, CA
- – Awnings For Trailers Atwood, CA
- – Remodeling Rv Atwood, CA
- – Awnings For Rv Atwood, CA
- – Rv Sofas Atwood, CA
- – Rv Carpet Installation Atwood, CA
- – Replacement Windows For Rv Atwood, CA
- – Rv Interior Furniture Atwood, CA
- – Rv Chairs Atwood, CA
- – Rv Dinette Booth Atwood, CA
- – OCRV Center
Awnings For Trailers Atwood, CA
Just like the windows in your vehicle or home, there are a couple of different kinds. Possibly you desire a window in your door so that you can allow the sunlight? Examine! The Motor Home Entry Door Obscure Glass Home window is excellent for that, with the addition that you can have your privacy while still allowing in the light.
And if you desire your home windows to be tinted, we can help you there. So you can have the sight, the sun, and the breeze, all while having the privacy you want. I make sure you're mindful of all that a window can do. It allows light, it maintains out rain, allows a wind, stays out bugs.
Without the windows to allow in the light to tell you whether it's night or day, you can obtain all kinds of blended, perhaps even miss a large occasion. Or picture you're having a cookout with your family members and you run inside to obtain some even more hotdogs. Without a window, you would not be able to see that your daughter is getting extremely near the fire and no one else has observed yet.
Rv Restoration Companies Atwood, CA

The sun is a fantastic decorating device to make use of, brightening space and visually broadening it. All the ideal decorators know just how much of an impact illumination can have. Whether you're using it to attract attention to an impressive piece of artwork or include heat to an entire space, illumination makes all the distinction in a space.
If you have older home windows that need changing, the procedure for setting up the brand-new windows isn't as easy as it looks. You require to eliminate the inner frame of the old home window by getting rid of the screws. You require to get rid of the outer frame of the window by pressing it out of the home window location.
Next off, get rid of any of the old sealants from the area with a putty knife. Once that is done, tidy the location with an ideal cleanser. When your area is tidy and complimentary of particles, examine the architectural components of the window opening. If there is anything that needs taken care of (rusted staples, as an example), make certain you repair them before mounting the new window.
Again, make certain you are using the assistance of another person to maintain every little thing straight and also and avoid the window from dropping. As soon as the external structure and the glass structure remain in place, safeguard them by placing and protecting the internal frame on the within the home window area.
Awnings For Trailers Atwood, CA
We think in offering the absolute best worth, quality, and selection (Rv Microwave Replacement Atwood). Plus, we want you to appreciate your purchase! In the event you wish to send out an item back to us, you might return most extra products for a reimbursement or exchange, minus shipping, within 90 days from the day of purchase unless kept in mind listed below under exceptions and exclusions
A return permission will certainly be supplied, and, in every instance, we'll begin to maintain an eye out for your return. For internet orders returned in-store, please take the product in original packaging, along with the billing to any kind of Camping World retail locations for a refund or exchange.
Remodeling Rv Atwood, CA
Refunds for internet orders provided in-store have the ability to be refunded to a GIFT CARD or SENT BY MAIL CHECK ONLY; some exemptions might apply. For retail purchases returned with a receipt, please return the unused and unopened thing, with the original sales invoice, for a complete refund or exchange. All returns with a gift receipt will certainly receive a store credit rating for the amount of the item at the time of purchase.
Proper ID will certainly be required in the type of a valid, state-issued vehicle driver's license or state ID card. We schedule the right to restrict or refuse returns without a receipt. Excellent Sam Participants who have actually kept a continual energetic subscription condition may return any type of extra and unopened product, bought on Feb.
When it involves recreational vehicle traveling, having the right windows can make all the distinction. Whether you're seeking far better insulation, enhanced ventilation, or simply a better sight, there are a couple of vital variables to think about when choosing the finest RV window for your vehicle. Right here are five pointers to aid you make an educated decision and appreciate your trips to the greatest.
Awnings For Rv Atwood, CA
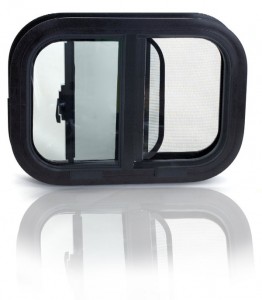
Set home windows are fixed and can not be opened up, while moving home windows can be opened up flat or vertically. Awning home windows are pivoted on top and open exterior, giving outstanding ventilation. Think about the sort of window that will certainly best suit your requirements and preferences prior to buying. When selecting a motor home home window, it is necessary to try to find high-grade materials and building and construction.
Seek home windows that are made from tempered glass, which is more powerful and more immune to damage than normal glass. In addition, the framework ought to be made from sturdy materials like light weight aluminum or vinyl, and should be designed to stop leaks and drafts. Purchasing a premium RV window will certainly guarantee that it lasts for years and offers trusted efficiency on your journeys.
The home window ought to fit well into the room supplied, with no spaces or rooms that might enable drafts or leaks. Action the opening carefully and select a home window that matches the dimensions. Additionally, consider the shape of the home window and how it will certainly fit with the overall style of your recreational vehicle.
Rv Sofas Atwood, CA
Your recreational vehicle's windows are the secret to enjoyable camping, allowing you see all the views of the road and your locations. If you're driving a motorhome, the windscreen is one of the most vital home window overall RV. No issue which sort of RV you possess, your home windows are a vital part of camping.

Older Motor homes were developed with much less innovative window systems, so there is wear and tear that may be apparent., yet certain issues like haze, scrapes, or issues with the housing of the window may indicate it's time to replace your Motor home home windows.
There are fractures, deep scratches, or chips in the home windows. Wind or water enters the gear from around the home windows, also when the home windows are shut. When replacing your Recreational vehicle windows, you're able to choose the right window for your RV and your requirements.
Rv Carpet Installation Atwood, CA
There are also options such as clear glass, pebbled windows, and tinted recreational vehicle home windows. Your design, safety and security, and home window use needs will aid establish which kind of motor home home window you select. Your motor home's home window frames combine the interior and outside components of your RV, and they must be correctly mounted to make sure that the sidewall's seal remains water tight.
The most effective way to make certain that your motor home home window substitutes are installed effectively is to leave it to the specialists. Our motor home service specialists can replace any home windows and glass on your RV, consisting of the windshield, side windows, and also the a lot more complex RV door home window substitute. Door home windows, otherwise mounted correctly, can rattle when you're using the RV door, so leave that repair service to our experts at Lazydays recreational vehicle.
Replacement Windows For Rv Atwood, CA
These windows open outward with a crank system, permitting ventilation while decreasing rain access (Rv Microwave Replacement Atwood). Usually larger home windows that do closed, providing unhampered sights and light if furnished. Before we study the operation of recreational vehicle windows, it's important to recognize exactly how they are set up. Here's a brief overview of the parts associated with a normal home window installment: The primary glass system.
Bolts safeguarding the maintaining ring. Gives a leak-proof seal around the window. These parts are installed on the manufacturing line soon after the wall surface setting up, ensuring the architectural integrity of your motor home. While recreational vehicle home windows differ from property windows, they need normal focus and upkeep to avoid issues like water leaks.
Rv Interior Furniture Atwood, CA
To make sure the longevity and performance of your Recreational vehicle home windows, take into consideration the following suggestions: Analyze the area where the window meets the wall surface for any kind of spaces or voids. In extreme situations, you may require to remove the window and reinstall it making use of putty or foam seal.
We encourage users to validate the contents and consult with their dealership or Keystone motor home for the most current info. If you have any type of concerns or need additional clarification, please do not hesitate to call your dealer or reach out to Keystone motor home directly.
These are the devices we required for our camper window substitute. Depending on your Motor home, you may or may not need all of these devices for your job.
No issue where you acquire your new Motor home window, you'll need to offer precise dimensions. Let's damage down our procedure for gauging a Motor home window for replacement.
Rv Chairs Atwood, CA
Don't put any outside stress on the home window while taking your measurements, or it might come loosened and autumn. For added security, you may desire to have a helper on a ladder outside, holding the home window in location while you measure. Thoroughly eliminate the framework of your old home window so that you can measure the opening (NOT the home window itself).
For our rectangular home window, we required to take only 4 measurements. Also, be aware that we're determining the opening itself. Utilizing a gauging tape, take cautious note of the width and height of the opening. It's a great idea to take measurements at several factors so you have an idea of just how easily the home window opening was reduced.
Rv Dinette Booth Atwood, CA
Next off, determine the thickness of the wall (deepness of the window), from the outside wall surface area to the indoor wall surface area. For this measurement, use your ruler (with measurements that run completely throughout). Place the leader right into the wall surface up until it touches the exterior of the window framework.
Dimensions of the old home window and the window opening are often various. Window suppliers make use of filler strips to maintain the home window degree and snug.
Step two times, cut once? Take your time to get an exact measurement, and verify it by determining a 2nd time. Exact measurements are very important to RV window substitute. You don't wish to loosely determine and round up or down. Always determine to the nearby 1/16th of an inch. Take a close appearance at your tape step and make sure you recognize which are the 1/16th-inch measurements.
OCRV Center
Address: 23281 La Palma Ave Yorba Linda, CA 92887Phone: (714) 909-1444
Email: [email protected]
OCRV Center
The home window producers are the very best authorities on installing their items. The producer of your brand-new recreational vehicle window has most likely included helpful standards or suggestions to make the installment less complicated. These kinds of guidelines are frequently included on producers' sites. If your brand-new home window featured directions in the package, make sure to maintain those helpful, as they may have outlined step-by-step directions in a consisted of booklet.
Rv Dining Table Atwood, CARv Microwave Replacement Atwood, CA
Motorhome Carpets Atwood, CA
Rv Sofa Sleeper Atwood, CA
Rv Sofas Atwood, CA
Rv Dinette Booth Atwood, CA
Replacement Windows For Campers Atwood, CA
Rv Chairs Atwood, CA
Rv Dinette Booth Atwood, CA
Motorhome Carpets Atwood, CA
Replacement Rv Windows Atwood, CA
Replacement Rv Windows Atwood, CA
Replacement Windows For Rv Atwood, CA
Rv Refrigerator Replacement Atwood, CA
Rv Chairs Atwood, CA
Awnings For Trailers Atwood, CA
Rv Dinette Booth Atwood, CA
Replacement Windows For Rv Atwood, CA
Awning Installation Atwood, CA
Rv Microwave Replacement Atwood, CA
Rv Carpet Replacement Atwood, CA
Rv Upholstery Atwood, CA
Rv Sofas Atwood, CA
Rv Dinette Table Atwood, CA
Rv Carpet Replacement Atwood, CA
Rv Carpet Installation Atwood, CA
Rv Couch Bed Atwood, CA
Replacement Rv Windows Atwood, CA
Rv Restoration Companies Atwood, CA
Rv Dining Table Atwood, CA
Rv Interior Furniture Atwood, CA
Rv Restoration Companies Atwood, CA
Motorhome Carpets Atwood, CA
Replacement Rv Windows Atwood, CA
Remodeling Rv Atwood, CA
Rv Sofas Atwood, CA
Rv Dinette Booth Atwood, CA
Rv Chairs Atwood, CA
Replacement Windows For Campers Atwood, CA
Replacement Windows For Rv Atwood, CA
Rv Interior Furniture Atwood, CA
Replacement Windows For Campers Atwood, CA
Awnings For Rv Atwood, CA
Rv Dining Table Atwood, CA
Replace Rv Flooring Atwood, CA
Rv Carpet Installation Atwood, CA
Rv Dining Table Atwood, CA
Rv Dinette Booth Atwood, CA
Rv Dining Table Atwood, CA
Rv Refrigerator Replacement Atwood, CA
Replacement Rv Refrigerator Atwood, CA
Rv Chairs Atwood, CA
Rv Replacement Awnings Atwood, CA
Rv Sofas Atwood, CA
Rv Dinette Booth Atwood, CA
Rv Replacement Awnings Atwood, CA
Rv Dining Table Atwood, CA
Rv Sofa Beds Atwood, CA
Rv Dinette Table Atwood, CA
Rv Upholstery Atwood, CA
Rv Dining Table Atwood, CA
Rv Carpet Replacement Atwood, CA
Awnings For Trailers Atwood, CA
Replacement Windows For Campers Atwood, CA
Motorhome Carpets Atwood, CA
Rv Sofa Beds Atwood, CA
Replacement Windows For Campers Atwood, CA
Motorhome Carpets Atwood, CA
Rv Refrigerator Replacement Atwood, CA
Awnings For Rv Atwood, CA
Rv Microwave Replacement Atwood, CA
Replacement Windows For Campers Atwood, CA
Rv Upholstery Atwood, CA
Awnings For Trailers Atwood, CA
Replacement Rv Windows Atwood, CA
Rv Replacement Furniture Atwood, CA
Replacement Windows For Rv Atwood, CA
Replacement Windows For Campers Atwood, CA
In Seo Packages Atwood, CA
Near Seo Service Atwood, CA
OCRV Center
Table of Contents
- – Awnings For Trailers Atwood, CA
- – OCRV Center
- – Rv Restoration Companies Atwood, CA
- – Awnings For Trailers Atwood, CA
- – Remodeling Rv Atwood, CA
- – Awnings For Rv Atwood, CA
- – Rv Sofas Atwood, CA
- – Rv Carpet Installation Atwood, CA
- – Replacement Windows For Rv Atwood, CA
- – Rv Interior Furniture Atwood, CA
- – Rv Chairs Atwood, CA
- – Rv Dinette Booth Atwood, CA
- – OCRV Center
Latest Posts
Stanton Seniors Insurance
Medicare Insurance Agent Near Me Mission Viejo
Seal Beach Payroll Service For Small Businesses
More
Latest Posts
Stanton Seniors Insurance
Medicare Insurance Agent Near Me Mission Viejo
Seal Beach Payroll Service For Small Businesses