All Categories
Featured
Table of Contents
- – Plumbing Installation Near Me Santee, CA
- – Black Mountain Plumbing
- – Water Heater Installers Santee, CA
- – Best Plumber Santee, CA
- – Plumber Company Near Me Santee, CA
- – Gas Line Plumber Santee, CA
- – Garbage Disposal Installation Santee, CA
- – Plumbing Installers Near Me Santee, CA
- – Water Leak Repair Santee, CA
- – Plumber Shower Installation Santee, CA
- – Affordable Plumbing Near Me Santee, CA
- – Best Plumber Santee, CA
- – Plumbers In Santee, CA
- – Black Mountain Plumbing
Plumbing Installation Near Me Santee, CA
Black Mountain Plumbing
9909 Hibert Street Suite E San Diego, CA 92131(858) 536-4161
Black Mountain Plumbing
This starts with discovering the essentials. Residential plumbing technicians invest most of their time inside a house. Whether its one-bedroom or four-bedroom, you'll still make use of a common plumbing professional.
Unlike the homes seen by a property plumbing professional, systems for companies can be significantly various. As an example, a food store might have an elaborate watering system for their veggies, which consists of sprayers and/or drains pipes. A dining establishment has numerous toilets in each washroom, in addition to rest rooms. A skyscraper can have thousands of commodes and an exceptionally intricate water heater.
When it concerns interaction, property plumbings have it easy. They're dealing directly with the owner(s) of a residential property or the main individual that utilizes the pipes system (when it comes to rental homes). When dealing with industrial buildings such as a healthcare facility or large apartment structure, they're not connecting with a proprietor, yet rather a conciliator such as an upkeep manager or renter.
Water Heater Installers Santee, CA
If it's a public building, such as a college or a court, the plumber likely has to wait for the project to be accepted by a board. Or else, they can experience a formal bidding procedure to be picked for the project. In enhancement to communication issues, commercial plumbings need to also handle higher insurance policy protection, thorough licensing, and unique considerations for medical facilities and various other health-related organizations.

By clearing the drain on the 20th flooring, plumbing technicians could accidentally block on a commode on the 12th floor. If they can't verify the blockage is out of the primary sewage system line, after that it causes flooding and other problems down the line. Plumbing technicians have looked for a simple way to find leakages for hundreds of years now.
It's a little linked system, so there are only a lot of areas the leakage can stem. Envision a structure with 30 stories and miles of piping, with a leak on the 25th flooring. Even if water is leaking via the ceiling on the 25th floor, doesn't mean that's where the water stemmed.
Every home, whether it's little or large, must adapt to approximately the very same structure codes. Homes often tend to have a straightforward plumbing format, yet that's not the instance for industrial homes.
Best Plumber Santee, CA
A commercial factory that makes use of countless gallons of water every day has an entirely various collection of building regulations that it should please. Business plumbing technicians need to know the ins-and-outs of multiple building regulations for each business. A restaurant has different requirements than a clothes shop. The commercial plumbing needs to be a jack-of-all-trades.
While a single plumbing can care for several home pipes troubles, it can take numerous plumbings to deal with a commercial job. If it's new building and construction, after that there might be an entire fleet of plumbing technicians servicing various aspects of the pipes system. With a lot of differences between an industrial plumber and a property plumber, its crucial to choose the ideal one for your needs.
They're not trained in the treatments for even more complex pipes issues. No matter of which type of plumbing help you need, Eyman has you covered.
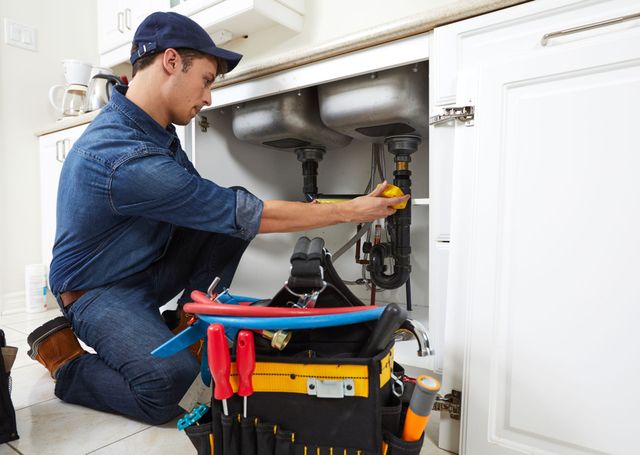
We may not offer it that a lot thought day to day as plumbing seems to function the very same anywhere we go, there's actually a quite large difference between commercial and domestic pipes. Residential pipes take care of solutions for the home, including water, drainpipe and sewer lines, hot water heater and every plumbing-related fixture.
Plumber Company Near Me Santee, CA
It covers several kinds of organizations and huge housing complexes, and entails the installation and maintenance of substantial waste elimination and water systems. If you're seeking to work with an expert plumbing for your, make certain that they are commercial instead of household plumbers (Santee Water Leak Repair). In the business space, everyday plumbing use is better compared to that of domestic
In a domestic arrangement, just the household hinges on the system, thus needing much less pipeline fitting and electrical outlets. As an outcome of more use of industrial plumbing, huge components with longer durability and high grading ought to be made use of. This will lower situations of break down because of strain and pressure.
Commercial buildings could have several floors, lots of sinks, and numerous commodes and rest rooms, while property buildings typically have straightforward and simple navigation through the building. This implies that business plumbing technicians need to recognize a more intricate building framework. No system is excellent and damages could take place at any type of factor.
For business heaters, big tank and even more gas input degrees are needed as commercial structures have even more people that need larger quantities of warm water than in property homes. Tanks for commercial use are bigger and can occupy to 250 gallons, while household heater tanks are generally no larger than 100 gallons.
Gas Line Plumber Santee, CA
Homes are extra conveniently manageable as a result of less and a lot more controllable residents. As an outcome of this, commercial pipes needs various collections of plumbing fixtures which are very easy to clean and drain off quickly. Commercial pipes tasks are more repeated because they can be done on huge plants with equipment utilized for bigger applications, unlike household plumbing which may call for various applications on various sections of pipes.
At times, business pipes needs to be done during the weekend breaks or holidays when workers aren't at work. is extra schedule oriented, as an example, a repair work to be done on an existing structure has actually to be done well within the moment framework as even more people depend on it, and hold-ups can cause losses.
Garbage Disposal Installation Santee, CA

From dripping faucets to blocked drains, pipes problems can quickly intensify right into expensive disasters if not resolved immediately and properly. Locating the finest residential plumbing professional can appear like a difficult job, however with a little support, you can browse the process smoothly and guarantee that your pipes needs are in qualified hands.
A plumbing professional with a proven track record is much more likely to have run into a vast range of pipes issues and established efficient remedies. Look for plumbing technicians or plumbing firms that have actually been in the market for numerous years.
A valid license guarantees that the plumbing has actually satisfied the needed needs and possesses the skills needed for the task. Insurance coverage, on the various other hand, shields you and your home in situation of accidents or damages that might take place during the pipes job. In the age of the internet, accessing client testimonials and testimonials is easier than ever before.
Plumbing Installers Near Me Santee, CA
Get in touch with several plumbers and demand detailed quotes for the solutions you need. A trustworthy plumbing will be transparent regarding their pricing, outlining the prices for labor, materials, and any kind of extra charges. Contrasting quotes allows you to examine the worth you're receiving for the price. Beware of uncommonly reduced quotes, as they might show poor work or using inferior products.
Select a plumbing whose prices lines up with market standards and reflects the top quality of work they offer. Clear interaction and professionalism are necessary qualities for any type of property plumber. A good plumber should be attentive to your problems, patiently answer your questions, and clarify the required repair services or installations in understandable terms.
It's admirable when individuals have enough abilities to evaluate problems and afterwards generate a solution. If you do not have official plumbing training under the assistance of a knowledgeable specialist, and if you are not accredited, you run the risk of making expensive blunders. You'll have to generate specialists to cleanse up the mess and then look after installation, maintenance, or repairs.
Normal homeowners and businesspeople likely do not have this same recognition. Over the years, ARS/Rescue Rooter has tackled a wide range of plumbing problems in business and household setups. Below are several of the most typical problems that consumers call us to assist address: This is an annoying scenario where water draws back up in a commode, tub, or sink.
Water Leak Repair Santee, CA
Usually, the wrongdoer is a busted commode flapper. The longer you wait to have this repaired, the larger your water bill will certainly be. Problems with stress happen if the pipes are old or stopped up or when the stress regulatory authority is falling short. This is generally a problem in industrial and business structures as opposed to homes.
The sound from a defective faucet can keep people awake at evening. It might stem from a worn-out washing machine, or the manage may not be shutting off all the method. Loud, uncommon sounds suggest something has gone awry with a component, such as the power or temperature level control Broken pipelines present special challenges in any type of area, yet are specifically challenging to look after in industrial setups, where the lines are often a lot longer than in homes.
Plumber Shower Installation Santee, CA
When it pertains to property plumbing, there are a range of services that fall under this category. From something as easy as a clogged drainpipe to an extra complicated issue like a sewage system line repair, plumbing companies supply a wide variety of services to fulfill the demands of home owners. In this post, we will certainly go over a few of one of the most typical domestic plumbing solutions to ensure that you can be much better educated when it comes time to pick a firm for your requirements.
Heating systems are an important function of every home, and when they stop working, it can be a major issue. A qualified plumbing company will be able to install a new water heating unit promptly and successfully so that you can get back to your regular routine (Santee Water Leak Repair). A professional pipes business will certainly utilize modern leak discovery tools to find the source of the leakage and make the required repair work.
We computed that 32% of Residential Plumbers are skillful in Pipes, Water Heating Systems, and Hand Devices. They're additionally recognized for soft skills such as Interaction abilities, Dexterity, and Mechanical skills. We break down the percentage of Residential Plumbers that have these abilities noted on their return to here: Created and established industrial and residential construction and solution pipes firm.
Affordable Plumbing Near Me Santee, CA
One of the essential soft skills for a residential plumbing professional to have is communication skills. You can see how this associates to what household plumbers do due to the fact that "plumbings have to have the ability to direct workers, bid on work, and plan function schedules." Additionally, a household plumber resume programs just how domestic plumbing technicians make use of interaction abilities: "supply great customer support and interaction.
Residential and industrial plumbing technicians practically have the exact same task, yet there are some differences. The reason is that they and the staff members of where they're doing the fixings don't obtain in each other's method.
When it comes to residential plumbing, there are a range of services that fall under this classification. From something as easy as a stopped up drain to an extra complex problem like a sewage system line repair, pipes business offer a wide variety of solutions to fulfill the needs of homeowners. In this blog site message, we will certainly talk about several of one of the most usual household plumbing solutions to make sure that you can be much better notified when it comes time to select a firm for your requirements.
Best Plumber Santee, CA
Home heating systems are a crucial function of every home, and when they stop working, it can be a major issue. A competent pipes company will be able to mount a brand-new hot water heater quickly and efficiently to make sure that you can obtain back to your regular regimen. One more usual domestic plumbing solution is appliance installment.
Leak discovery is another solution that household pipes business supply. leakages can take place in both noticeable and hidden locations of your home, and if left unaddressed, they can cause severe water damages. A certified pipes business will utilize cutting edge leakage discovery tools to situate the resource of the leakage and make the essential repair services.
We determined that 32% of Residential Plumbers are proficient in Pipes, Water Heating Systems, and Hand Devices. They're also understood for soft skills such as Communication skills, Mastery, and Mechanical skills. We break down the percentage of Residential Plumbers that have actually these abilities provided on their resume here: Established and established industrial and domestic building and construction and solution pipes business.
In addition, a household plumbing professional resume shows exactly how household plumbing professionals use communication skills: "supply wonderful client service and interaction.
Plumbers In Santee, CA
Black Mountain Plumbing
Address: 9909 Hibert Street Suite E San Diego, CA 92131Phone: (858) 536-4161
Email: [email protected]
Black Mountain Plumbing
Residential and industrial plumbers practically have the very same task, but there are some differences. For starters, a property plumber normally has regular 9-5 hours while an industrial one is likelier to function off-hours. The factor is that they and the staff members of where they're doing the fixings don't obtain in each various other's way.
Plumber For Clogged Toilet Near Me Santee, CAShower Repair Near Me Santee, CA
Residential Plumbing Contractors Near Me Santee, CA
Affordable Plumbing Near Me Santee, CA
Residential Plumber Santee, CA
Residential Plumbing Services Near Me Santee, CA
Gas Line Plumber Santee, CA
Water Filtration Services Near Me Santee, CA
Kitchen Plumbing Santee, CA
Near Me Plumber Santee, CA
Residential Plumbing Contractors Near Me Santee, CA
Kitchen Plumbing Santee, CA
Bathroom Plumber Santee, CA
Affordable Plumbing Near Me Santee, CA
Residential Plumbing Repair Near Me Santee, CA
Shower Repair Santee, CA
Affordable Plumbing Near Me Santee, CA
Plumber Shower Installation Santee, CA
Plumbers In Santee, CA
Affordable Plumbing Near Me Santee, CA
Water Leak Repair Santee, CA
Plumbing Installation Near Me Santee, CA
Water Line Repair Santee, CA
Local Plumbing Near Me Santee, CA
Plumber Company Near Me Santee, CA
Affordable Plumbing Near Me Santee, CA
Shower Repair Santee, CA
Bathroom Plumber Santee, CA
Water Heater Installers Santee, CA
Plumber For Clogged Toilet Near Me Santee, CA
Plumbers In Santee, CA
Plumbing Installation Santee, CA
Affordable Plumbing Near Me Santee, CA
Plumbing Installers Near Me Santee, CA
Plumber For Clogged Toilet Near Me Santee, CA
Plumber For Clogged Toilet Near Me Santee, CA
Local Plumbing Near Me Santee, CA
Best Plumber Santee, CA
Near Me Plumber Santee, CA
Residential Plumber Santee, CA
Best Plumber Santee, CA
Plumbing Installation Santee, CA
Plumbing Installation Near Me Santee, CA
Plumber Company Near Me Santee, CA
Kitchen Plumbing Santee, CA
Plumbing Installation Santee, CA
Residential Plumber Santee, CA
Kitchen Plumbing Santee, CA
Best Plumbing Santee, CA
Gas Line Plumber Santee, CA
Best Plumbing Santee, CA
Shower Repair Near Me Santee, CA
Gas Line Plumber Santee, CA
Affordable Plumbing Near Me Santee, CA
Residential Plumbing Services Near Me Santee, CA
Plumbing Installers Near Me Santee, CA
Garbage Disposal Installation Santee, CA
Best Plumbing Santee, CA
Gas Line Plumber Santee, CA
Best Plumbing Santee, CA
Plumbing Installers Near Me Santee, CA
Residential Plumbing Services Near Me Santee, CA
Plumbing Installation Services Santee, CA
Plumber Company Near Me Santee, CA
Water Line Repair Santee, CA
Best Seo Marketing Santee, CA
Finding A Local Seo Solutions Santee, CA
Black Mountain Plumbing
Table of Contents
- – Plumbing Installation Near Me Santee, CA
- – Black Mountain Plumbing
- – Water Heater Installers Santee, CA
- – Best Plumber Santee, CA
- – Plumber Company Near Me Santee, CA
- – Gas Line Plumber Santee, CA
- – Garbage Disposal Installation Santee, CA
- – Plumbing Installers Near Me Santee, CA
- – Water Leak Repair Santee, CA
- – Plumber Shower Installation Santee, CA
- – Affordable Plumbing Near Me Santee, CA
- – Best Plumber Santee, CA
- – Plumbers In Santee, CA
- – Black Mountain Plumbing
Latest Posts
Health Insurance Plans For Family Laguna Niguel
Swamp Cooler Water Line Repair Altadena
North Hills Home Ac Repair
More
Latest Posts
Health Insurance Plans For Family Laguna Niguel
Swamp Cooler Water Line Repair Altadena
North Hills Home Ac Repair