All Categories
Featured
Table of Contents
- – Custom Motorhome Paint Jobs Irvine, CA
- – OCRV Center
- – Painting Fiberglass Motorhome Irvine, CA
- – Rv Paint Job Irvine, CA
- – Painting An Rv Irvine, CA
- – Rv Painting Near Me Irvine, CA
- – Painting Rv Walls Irvine, CA
- – Custom Motorhome Paint Jobs Irvine, CA
- – Custom Painted Motorhomes Irvine, CA
- – Painting Rv Irvine, CA
- – Rv Paint Shops Near Me Irvine, CA
- – Painting An Rv Irvine, CA
- – Rv Paint Job Irvine, CA
- – Rv Paint And Body Shops Near Me Irvine, CA
- – OCRV Center
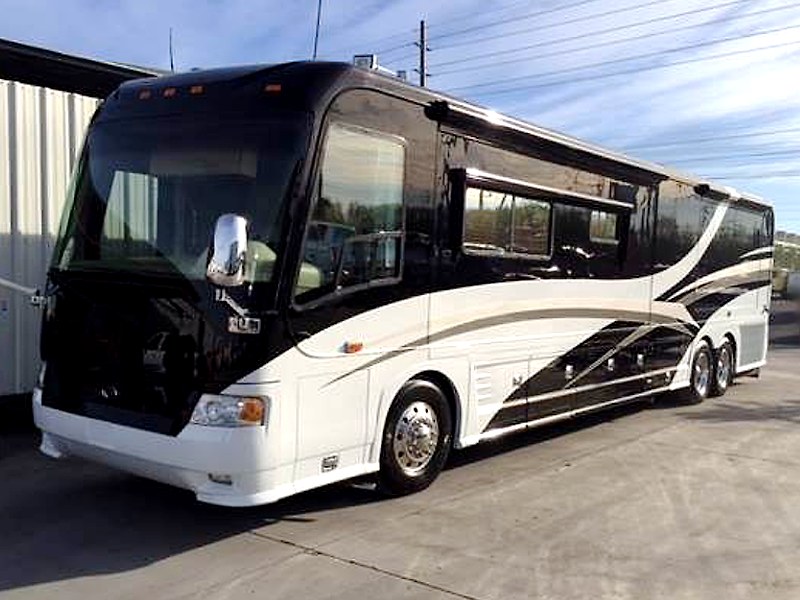
Custom Motorhome Paint Jobs Irvine, CA
Make certain to let them properly completely dry according to the directions on the filler you're utilizing. Sanding is an extremely important action! Count on me, it's not a fun one and makes a big mess, however it's definitely worth it! We checked out avoiding sanding on some of the cupboards during our bathroom restoration and discovered that the paint doesn't stick.
This means it is less likely to peel off. We (and by we, I imply Tucker haha) sanded the island actually well and have had absolutely no problems with paint peeling although it's been over a year since then. I understand you desire I weren't informing you this, haha! Depend on me, do not miss sanding (Rv Painting Irvine).
Personally, I used a microfiber cloth with just water and it obtained whatever up. You do not desire any kind of dirt or sawdust being left behind as it can obtain right into your paint job and mess up the texture/finish.
Painting Fiberglass Motorhome Irvine, CA
I have actually seen that doing this system can make a huge distinction! Successive, grab your painter's tape! I such as to utilize this 1-inch painter's tape, but you can make use of whatever you favor. Very carefully put the tape around any surfaces that need to be safeguarded. I typically put it on the floors, any type of wall surfaces I'm not paint, around lights, and electric outlets.
When I painted our Motor home island, I utilized a puppy pad to establish my paint can on and scooted it around the island as I repainted. Now that your prep work is total, you're ready to prime your RV cupboards.
One of the most common questions I am asked is what guide I like to use. It functions truly well, and it also dries out promptly. I advise making use of an oil-based guide instead of a water-based one.
Rv Paint Job Irvine, CA
It's normally completely dry to the touch in regarding 30 mins and I'm able to paint quickly after that. You've prepped and topped, and you're ready to paint! I like using a paintbrush for guide and paint, but you can also use foam rollers if you're extra comfortable with that.
I always do 2-3 coats of paint, depending on the color. Darker paint colors have a tendency to need a 3rd layer.
Painting An Rv Irvine, CA
I know several RVers have utilized chalk paint on their camper closets, however I don't have any type of personal experience keeping that (Rv Painting Irvine). There are a great deal of possible paint kinds you can utilize, and a whole lot to learn more about paint kinds. I such as to use EasyCare Ultra Premium Satin Interior paint from the local hardware shop
Do your study and choose what paint is going to be best for you and your demands. Currently you understand just how to repaint RV cupboards, and all that's left is a couple of ending up actions.
The only primary difference when paint motor home walls is that you do not wish to sand them. You will certainly still need to cleanse them extremely extensively, however miss the sanding and go directly to the primer. If you sand your RV wall surfaces, they will lose their structure, and the paint will certainly have a more challenging time adhering to the wall surfaces.
Whatever repaint you choose to utilize, simply make certain you prep and prime it ahead of time. Other popular choices are oil-based paint and chalk paint. The most effective way to obtain paint to stick to recreational vehicle cupboards is by making use of 220 grit sandpaper to harsh up the surface before you paint.
Rv Painting Near Me Irvine, CA
Painting recreational vehicle cupboards is effort, yet completion result is SO worth it! Repainting your motor home closets can permit you to make your recreational vehicle extra pleasant and individualized to your design and choices. It's incredible what a brand-new layer of paint can do. Yes, you can repaint RV closets without fining sand.
Avoiding the sanding step of painting Recreational vehicle closets can result in the paint not adhering well and peeling off. It takes 4-8 hours to repaint Recreational vehicle closets, depending on exactly how several you are doing.
I really hope that this article regarding just how to paint camper cabinets has actually been practical and that repainting the cabinets in your RV is not an overwhelming idea anymore. RV restorations can take a long time, however the end result is absolutely worth it! I actually love how our closets have turned out thus far, and I'm thrilled to end up our projects! How to Paint recreational vehicle Closets 1 day Remove any kind of hardware, cabinets, and doors from your motor home closets.
Permit plenty of dry time for the primer to completely cure before including the closet paint. After the primer has dried, apply 2-3 coats of paint to your Recreational vehicle closets.
Painting Rv Walls Irvine, CA
Passion in RV life has actually expanded over the in 2014, with more and even more people choosing to survive the road permanent. Tailoring these tiny homes on wheels can be challenging though, especially if you're not acquainted with interior decoration. Bo and Madison Cox, that have actually restored 10 Recreational vehicles for their business Troop Nashville, talked to Insider concerning how to make a mobile home appearance as welcoming as feasible.
According to the Coxes, a lot of producers create Motor homes with dark interiors. "The factor they do it is that people are constantly like, 'Oh, it's going to get so dirty due to the fact that it's white,'" Madison stated. You might prefer the darker appearance if you're simply using your recreational vehicle for camping or various other situations where you are tracking in dust frequently, but for people that live in Recreational vehicles full-time, that isn't constantly the case.
Bo and Madison informed Expert that people run into trouble with painting a RV when they approach the remodelling similarly they would certainly a home renovation. "A great deal of individuals will certainly be like, 'Oh, I painted my area at home, so we can paint a camper,' however there's so much that goes right into it," Madison stated.
Custom Motorhome Paint Jobs Irvine, CA
Painting a motor home is various than painting a home. Surfaces in Motor homes aren't constructed like walls in a home, so they need to be cleansed and sanded at length before they can be painted. The Coxes told Expert they generally comply with a five-step procedure when painting. They start by cleansing the wall surfaces with a heavy-duty cleaner that has trisodium phosphate in it.
For closets, that implies sanding, and for both wall surfaces and cabinets, they patch and sand any type of openings. They also caulk the wall surfaces and cabinets at this stage of the process.
She claimed that peeling off frequently takes place when wall surfaces aren't correctly sanded or cleansed prior to being keyed and painted. If you don't prep your surface areas before you repaint, the paint will likely peel. Skipping components of the paint procedure, like not patching holes, can leave mobile-home owners with an unpleasant look. Rv Painting Irvine.
Custom Painted Motorhomes Irvine, CA
Sharing is caring! Little did we understand just how much work is entailed with painting recreational vehicle wall surfaces. However we discovered via the procedure and today I am sharing some useful suggestions on in your trailer or camper. Review the back story if you missed the information of our We painted practically fully of our residence (our house that we recently offered!) in the last 10 years) so we were not newbies in painters, so to state.
Why? You have a little room to collaborate with. It's a huge pain in the back base to relocate about in little square video. You most likely deal with a vinyl wallpaper that you need to prep like insane! It will probably be your biggest part of your camper paint task.
Painting Rv Irvine, CA
SECOND. One solitary point which is PAINT- can change the within your camper substantially. Let's dive in and discover how to! Electric screwdriverSanderGlovesDegreaser we utilized water and vinegar however there are various other options you can choosePainters Tape (a GREAT DEAL!)PrimerPaintProtective gogglesPaint Coveralls In my viewpoint, this action is one of the most vital part of your paint.
We chose to spray paint our camper instead of hand painting the wall surfaces and closets, so we needed to get rid of and cover every little thing actually. Degrease your vinyl wallpaper with a degreaser or water and vinegar blend. This is what we used, and it worked flawlessly. every square inch! Then fill up the holes that you understand you won't need anymore.
Your wall surfaces and surfaces. Do not skip this action either! I fined sand the wall surfaces, but I had small locations where I had not been that complete with fining sand, and the paint started peeling on those locations. Take your time with sanding. We used an electric sander to make the procedure much faster. So SAND, SAND and SAND some even more.
This action will certainly additionally spend some time, yet it is a must, particularly if you will make use of a spray painter for your project. After you have actually done all the careful prepping job, you can prime the wall surfaces. We additionally repainted the ceiling at the same time as it would certainly have looked a great deal of yellower in shade than the wall surfaces if we didn't.
Rv Paint Shops Near Me Irvine, CA
Considered that we used spray painter, we utilized at the very least a couple of gallons of guide to prime every little thing (including the closets!). Priming was quick and a simple process with the spray painter equipment. Let the primer completely dry totally prior to you apply the paint. I wanted great white walls and utilized BEHR Ultra White (my best white color -or at the very least it has actually been in our old residence!).
Some areas needed 2 layers of paint. Make certain to wait in between the coats if you will use two layers. Wrap-up:. It took lots of hours to complete this action of our Camper renovation, yet I still say it deserved every decline of sweat. Paint can go such a long means, particularly in such a little space.
We eliminated the cupboard doors and hardware. Going back later to try and match 28 closet doors up with the best equipment and area is just unpleasant.
After the paint dried (usually over night), they went back in the envelopes until we were all set to put the closet doors back up. The spray paint has functioned well so much.
Painting An Rv Irvine, CA
The much heavier used cabinet and drawer pulls have actually damaged a bit. We have not re-painted or changed them yet, due to the fact that they really aren't that negative. Ultimately, we will likely spray repaint them again. We tried leaving the lights and electrical outlets on and simply taping around them. It looked unpleasant, so we finished up loosening these and painting under them instead.
This was not the very best ideawhen we did pull the carpeting up we had to go back and touch up the whole time the base of the wall surfaces, due to the fact that the carpeting is thicker than the vinyl we placed in. It would certainly have been better to eliminate the carpet, after that paint, and finally mount the new floors.
Rv Paint Job Irvine, CA
We also do general vehicle collision repair services for auto, light vehicles, and several other automobiles. Fleet repair services are another huge component of what we do. In brief, we are one of San Dieog Area's a lot of versatile repair centers for almost automobile you can throw at us!.
You'll be amazed at exactly how a fresh layer of paint, combined with straightforward decoration updates, can turn an out-of-date camper into a stylish home on wheels! They restored the camper to make it their own, painting the cabinets and wall surfaces white throughout for a "light and ventilated" appearance.
I like the comparison of the darker closets versus the white wall surfaces. The pair who own this 1993 Jayco Eagle Collection 300BH restored it to be able to take a trip economically with their 3 children. Their objective is to see every national park in the U.S. To see even more pictures of this motor home, see the owners' Instagram page, @thesearebetterdays.
At first, they were a little bit intimidated by the idea of getting an older motorhome, however after a mechanical inspection, they decided to bring it home and offer it some tender loving care. The repainted wall surfaces and cupboards changed the interior, but I specifically love the custom kitchen counters they included! Picture Credit score: Alura and Wesley, the proprietors of this 2010 Jayco Designer 35RLTS, live full-time in the Florida Keys.
Rv Paint And Body Shops Near Me Irvine, CA
OCRV Center
Address: 23281 La Palma Ave Yorba Linda, CA 92887Phone: (714) 909-1444
Email: [email protected]
OCRV Center
Though they painted a lot of their cupboards white, they determined to create an accent wall by painting the cupboards at the end of their motor home a stunning color of teal. The remainder of the RV has white wall surfaces, making the teal fireplace pop much more! Remodelled by Alice Zealy of rain2shine endeavors, this before-and-after display bold paint options.
Motorhome Paint Shops Irvine, CACustom Motorhome Paint Jobs Irvine, CA
Rv Paint Repair Irvine, CA
Paint Motorhome Exterior Irvine, CA
Custom Rv Paint Irvine, CA
Rv Paint Irvine, CA
Class A Rv Custom Paint And Repair Irvine, CA
Rv Paint Irvine, CA
Paint Fiberglass Rv Irvine, CA
Rv Painter Irvine, CA
Motorhome Paint Shops Irvine, CA
Motorhome Paint Shops Irvine, CA
Rv Paint Shop Near Me Irvine, CA
Rv Paint Shops Near Me Irvine, CA
Rv Painter Irvine, CA
Motorhome Painting Irvine, CA
Rv Paint Irvine, CA
Painting Rv Exterior Irvine, CA
Paint Rv Irvine, CA
Motorhome Painting Irvine, CA
Rv Paint And Body Shops Near Me Irvine, CA
Painting An Rv Irvine, CA
Custom Motorhome Paint Jobs Irvine, CA
Custom Painted Motorhomes Irvine, CA
Motorhome Painting Near Me Irvine, CA
Rv Paint Job Irvine, CA
Rv Paint And Repair Irvine, CA
Motorhome Paint Repair Irvine, CA
Rv Paint Irvine, CA
Custom Rv Paint Jobs Irvine, CA
Motorhome Painting Near Me Irvine, CA
Painting An Rv Irvine, CA
Rv Paint Irvine, CA
Rv Exterior Paint Irvine, CA
Painting Fiberglass Motorhome Irvine, CA
Rv Paint Repair Irvine, CA
Rv Paint Repair Irvine, CA
Rv Painter Irvine, CA
Rv Painter Irvine, CA
Rv Exterior Paint Irvine, CA
Painting Rv Exterior Irvine, CA
Paint Rv Irvine, CA
Rv Paint Repair Irvine, CA
Motorhome Custom Paint Irvine, CA
Custom Painted Motorhomes Irvine, CA
Rv Painting Irvine, CA
Painting Rv Irvine, CA
Paint Rv Irvine, CA
Rv Paint Repair Irvine, CA
Paint Rv Irvine, CA
Motorhome Custom Paint Jobs Irvine, CA
Motorhome Custom Paint Jobs Irvine, CA
Rv Paint Shops Near Me Irvine, CA
Rv Paint Repair Irvine, CA
Painting Rv Walls Irvine, CA
Painting Rv Exterior Irvine, CA
Rv Paint Repair Irvine, CA
Rv Paint Irvine, CA
Paint Rv Irvine, CA
Motorhome Painting Irvine, CA
Rv Paint And Body Shops Near Me Irvine, CA
Rv Paint Shop Near Me Irvine, CA
Painting Rv Exterior Irvine, CA
Custom Rv Paint Jobs Irvine, CA
Class A Rv Custom Paint And Repair Irvine, CA
Motorhome Paint Repair Irvine, CA
Rv Paint And Body Shops Near Me Irvine, CA
Paint Fiberglass Rv Irvine, CA
Rv Paint Irvine, CA
Class A Rv Custom Paint And Repair Irvine, CA
Motorhome Paint Repair Irvine, CA
Painting Fiberglass Motorhome Irvine, CA
Rv Paint And Repair Irvine, CA
Motorhome Custom Paint Jobs Irvine, CA
Paint Fiberglass Rv Irvine, CA
Rv Painting Near Me Irvine, CA
Custom Rv Paint Jobs Irvine, CA
Painting Rv Exterior Irvine, CA
Around Here Seo Company Near Me Irvine, CA
Close By Seo For Law Firms Irvine, CA
OCRV Center
Table of Contents
- – Custom Motorhome Paint Jobs Irvine, CA
- – OCRV Center
- – Painting Fiberglass Motorhome Irvine, CA
- – Rv Paint Job Irvine, CA
- – Painting An Rv Irvine, CA
- – Rv Painting Near Me Irvine, CA
- – Painting Rv Walls Irvine, CA
- – Custom Motorhome Paint Jobs Irvine, CA
- – Custom Painted Motorhomes Irvine, CA
- – Painting Rv Irvine, CA
- – Rv Paint Shops Near Me Irvine, CA
- – Painting An Rv Irvine, CA
- – Rv Paint Job Irvine, CA
- – Rv Paint And Body Shops Near Me Irvine, CA
- – OCRV Center
Latest Posts
Health Insurance Plans For Family Laguna Niguel
Swamp Cooler Water Line Repair Altadena
North Hills Home Ac Repair
More
Latest Posts
Health Insurance Plans For Family Laguna Niguel
Swamp Cooler Water Line Repair Altadena
North Hills Home Ac Repair